If you want to customize your Android 14 [or lower] device with some cool tweaks and mods, then you should try Xposed Framework/LSPosed. This is a tool that lets you install different modules that can change the look and feel of your device.
You can find modules for battery saving, ad blocking, UI enhancements, sound mods, and more. All you need to do is follow this guide and learn how to install Xposed Framework/LSPosed on your device. Back in the day, Android users had to rely on ClockWorkMod recovery, CyanogenMod ROMs, and Titanium Backup for modding their devices. But Xposed Framework made it much easier and faster to get the mods you want.
If you love tinkering with your phone, you might have heard of Xposed Framework/LSPosed. It’s a tool that lets you customize your Android 13 device with various modules, without needing to flash a custom ROM.
But Xposed Framework/LSPosed is not as popular as it used to be, because many phone makers have already added similar features to their software. And rooting your phone, which is required for Xposed Framework/LSPosed, can be risky and complicated. But if you’re still curious and adventurous, you can follow these steps to install Xposed Framework/LSPosed on your Android 13 device.
Install ‘Zygisk’ Xposed Framework/LSPosed on Android 13/14 [NEW]
Hey, welcome to this tutorial on how to install Xposed Framework/LSPosed on your Android 13 device. You might have heard that there’s a new way to do this, using Zygisk instead of Riru. This makes the whole process much easier and faster because you only need one file instead of two. Sounds good, right? Well, let me show you how it’s done.
I’ve divided the steps into different sections so you can follow them easily. Just make sure you do them in the same order as I tell you. And please, be careful with what you’re doing, because this is not a risk-free procedure. I’m not responsible if your device gets bricked, your data gets lost, or if you start a nuclear war by mistake.
1: Root your Android 13/14 Device
Before you do anything else, you need to have Magisk root on your device. If you don’t know how to do that, check out the tutorial on How to Root Android Devices via Magisk Patched Boot/Init_boot.
2: Enable Zygisk
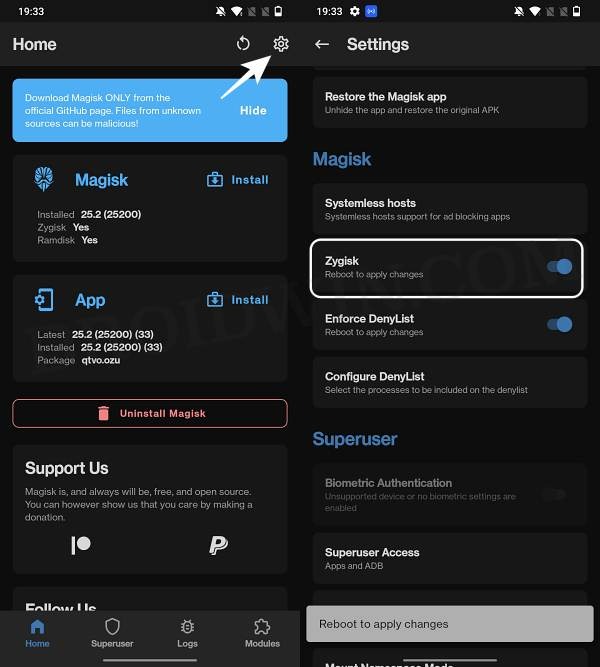
To use Zygisk, you need to activate it in Magisk first. Here’s how you do it:
- – Open Magisk and look for the settings icon in the top right corner. Tap on it to open the settings menu.
- – Find the option that says Zygisk and turn it on. You will see a toggle switch next to it.
- – After you enable Zygisk, you need to reboot your device for the changes to take effect.
- – When your device restarts, open Magisk again and check if Zygisk is working. It should say Yes next to Zygisk on the main screen.

3: Download Zygisk LSPosed Xposed Framework
- Next up, grab hold of the Zygisk LSPosed Xposed Framework for your Android 13 device from below.
GitHub Download Link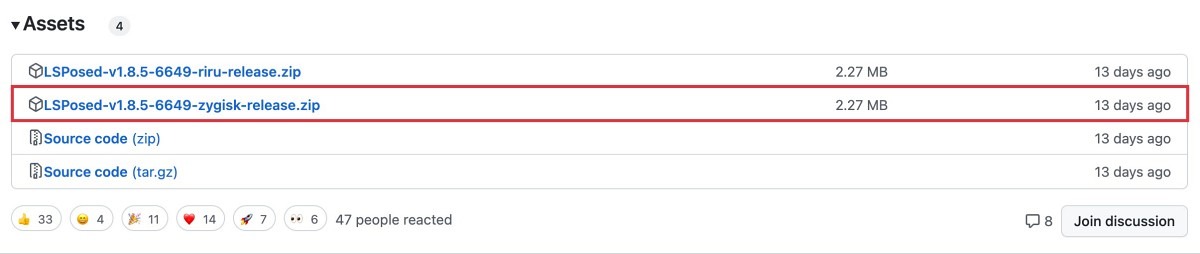
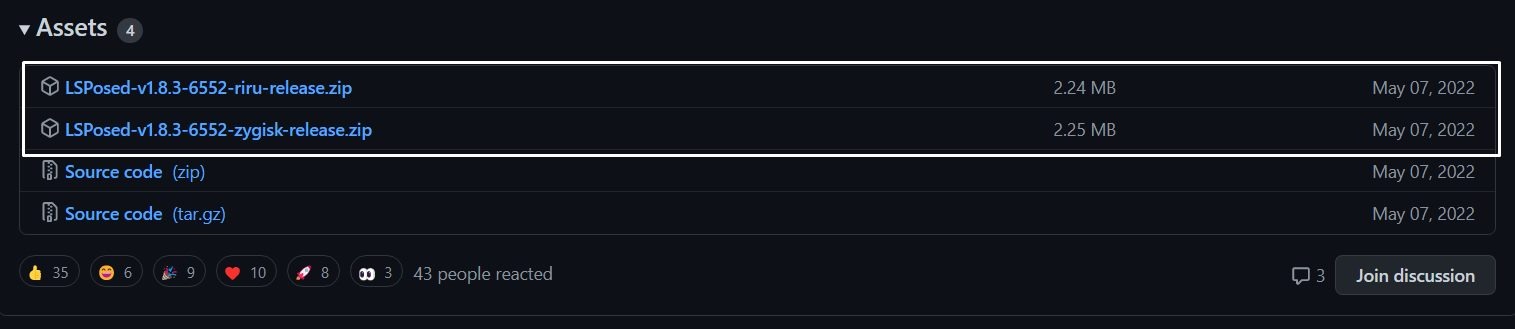
- You should scroll to the Assets section and download the file that has ‘zygisk’ in its name.
4: Install LSPosed Xposed Framework on Android 13/14
Ready to try LSPosed? It’s easy to install with Magisk. Just open Magisk and look for the Modules section. Tap on it and then choose Install from Storage. Find the LSPosed module and flash it. That’s it! Now you just need to reboot your device and enjoy LSPosed.
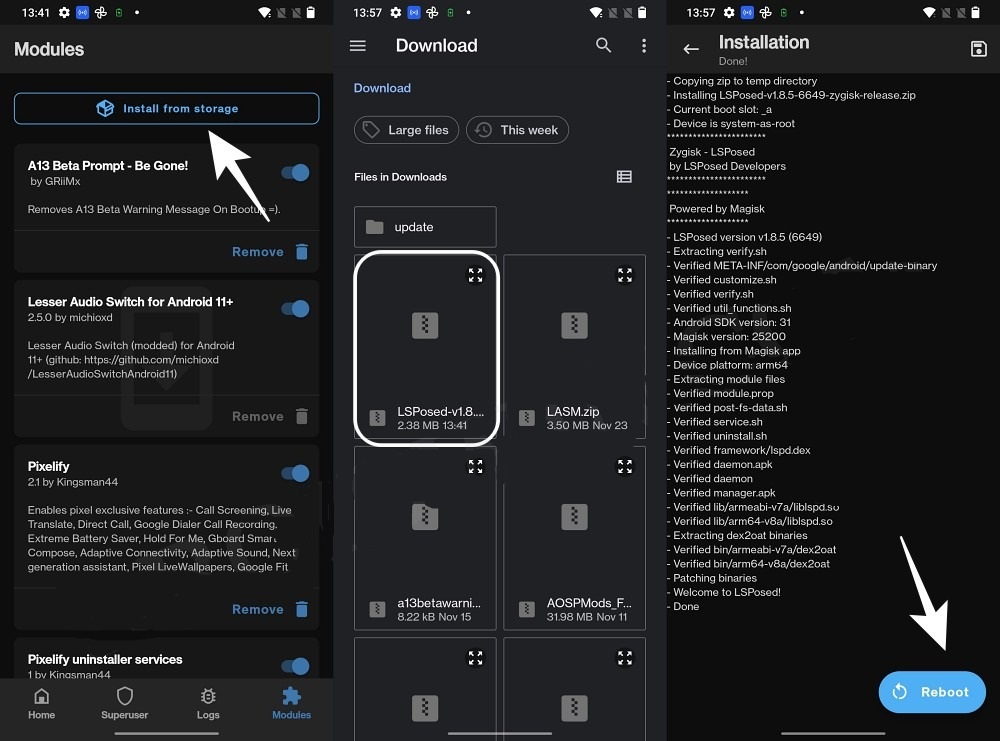
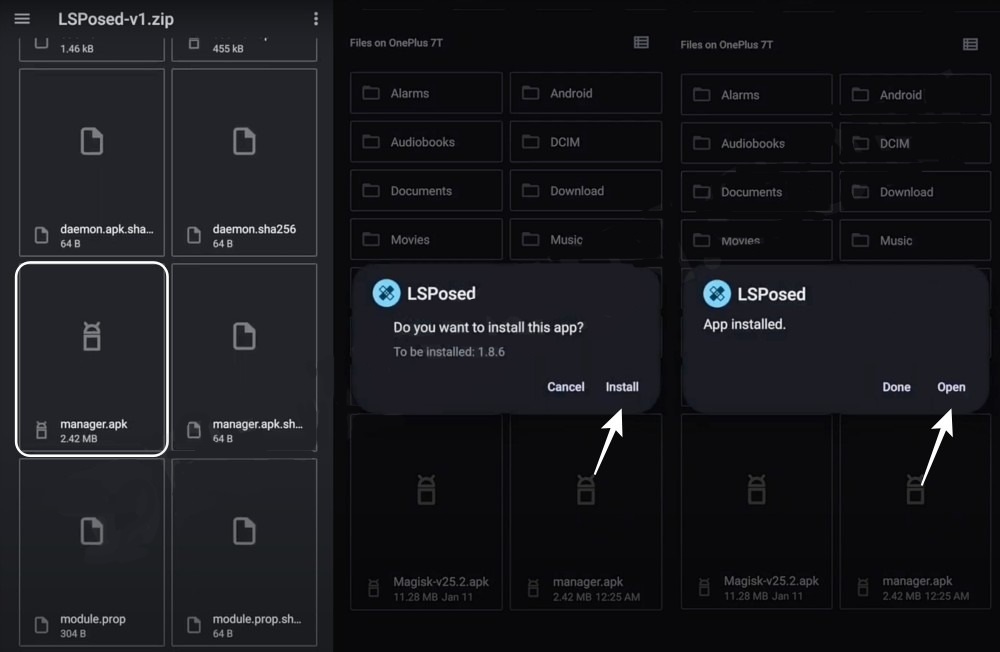
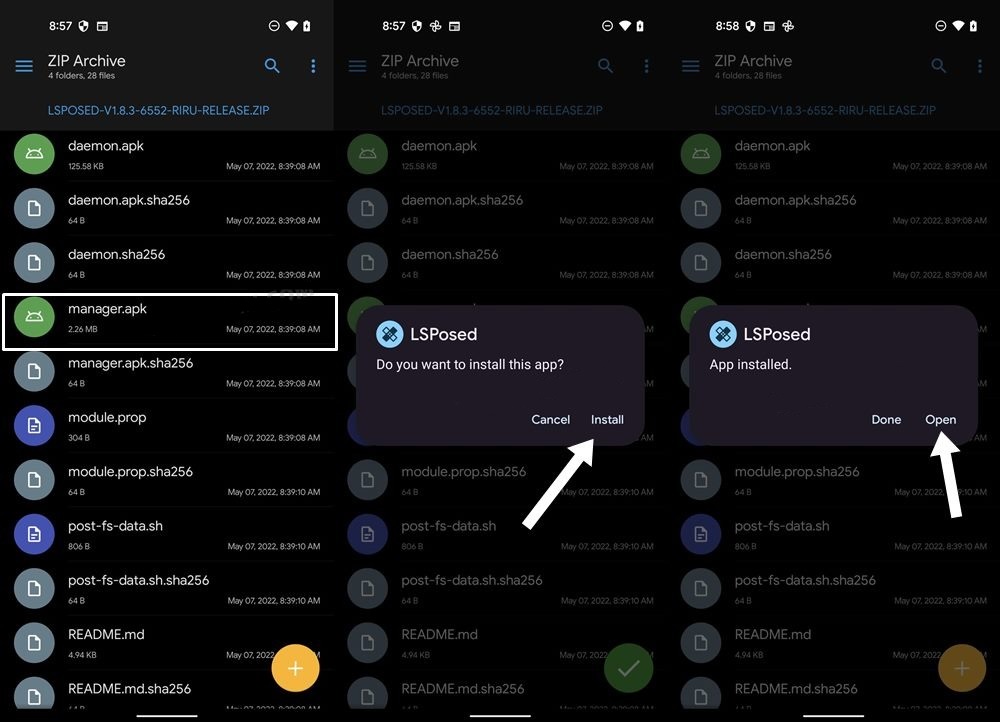
- Next, we need to set up the front end too. Just open the LSPosed ZIP file and look for the manager.apk file inside it.
- Then run it and follow the steps on the screen to install the LSPosed app. After that, you can use this app to control Xposed and all its modules easily.
You’re done! You just learned how to get LSPosed Xposed Framework on your Android 13 phone. Forget about the old way below and go straight to the part where you flash modules.
Install ‘Riru’ Xposed Framework/LSPosed on Android 13/14 [OLD]
Hey, before you start messing with your device, read this carefully. I’ve divided the instructions into different sections so you can follow them easily. But don’t skip any steps or change the order, okay?
Because if you do, you might end up with a nuclear disaster, a missed alarm, or a broken device and lost data. And trust me, you don’t want that. Droidwin and its members are not responsible for any of that, so do this at your own risk.
1: Root your Android 13/14 Device
The first thing you need to do is to root your device with Magisk. This will let you modify the system files and install custom ROMs. You can check out our tutorial on How to Root Android Devices via Magisk Patched Boot/Init_boot if you need help with that.
2: Download Riru and LSposed Modules
Now we need to install two important modules: Riru and LSposed. We chose LSposed over EdXposed because it can pass the SafetyNet test. Also, it has more support and users than EdXposed. These modules will help us to tweak our device with ease.
- Riru Module: GitHub Download Link
- LSposed Module: GitHub Download Link
Depending on your Magisk settings, you need to choose the right version of LSposed to install. If you have Zygisk enabled, then go for the Zygisk version.
If you don’t have Zygisk enabled, then go for the RIRU version. You can also use the RIRU version with Zygisk, but you’ll have to turn off Zygisk in Magisk > Settings first.
3: Install Riru and LSposed Modules
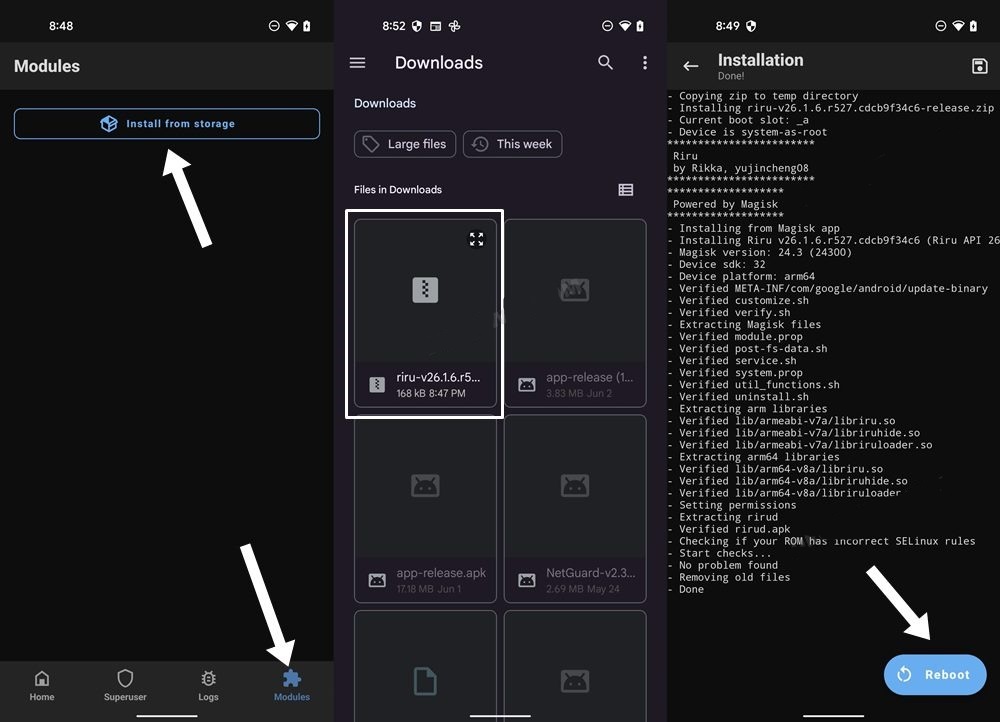
- To begin with, launch the Magisk App and go to the Modules section.
- Then tap on Install from Storage, navigate to the Riru module, and select it.
- It will now be flashed onto your device. Once done, hit Reboot.
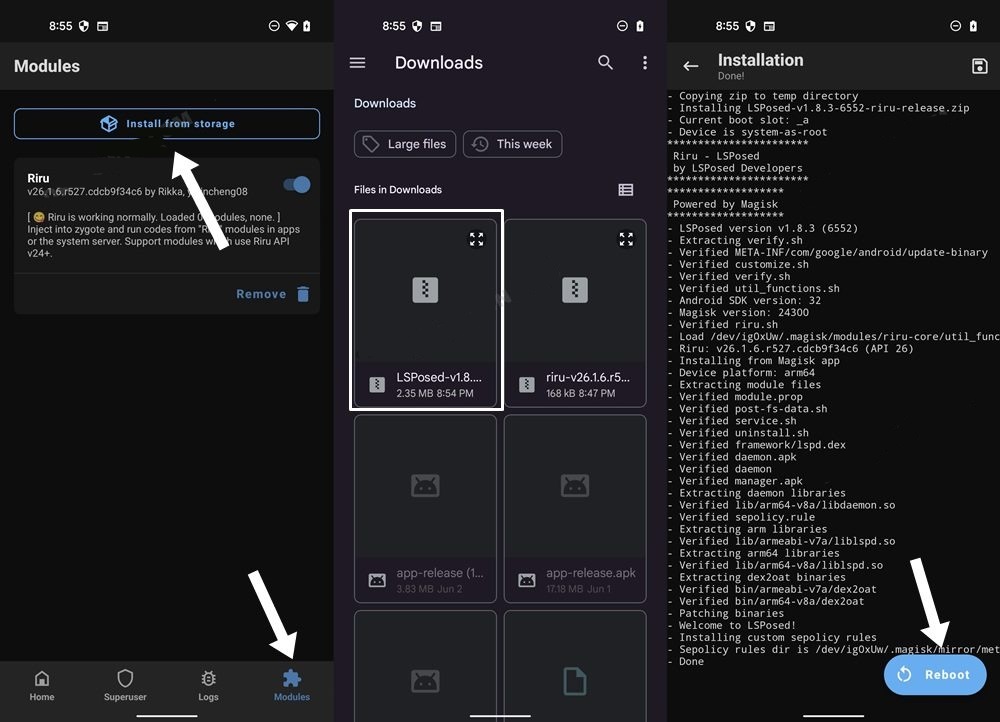
- Again, launch Magisk and go to its Modules section.
- Then tap on Install from Storage, navigate to the LSposed module, and select it.
- It will now be flashed onto your device. Once done, hit Reboot.
4: Install LSposed Manager
Here’s how you can get the app that lets you customize your device with different modules. It’s super easy and fun, trust me.
- First, you need to open the ZIP file that has the LSposed Module in it. You can use any file manager app for that, no need to unzip it or anything.
- Next, you need to tap on the manager.apk file and follow the steps on the screen to install the app.
- That’s it! You’ve just installed the LSposed Manager app on your device. Now you can explore all the cool modules and tweak your device however you like.
You’re done! You’ve just learned how to set up Xposed Framework/LSPosed on your Android 13 device. Now, let’s see how you can install, disable, and uninstall modules. It’s easy and fun. Just follow these steps.
How to Install Xposed Framework/LSPosed Modules
- Launch the LSposed Manager App and go to its Repository section.
- Then select the desired module from the list and go to its Release tab.
- After that, click on the link arrow. You will be taken to its download page
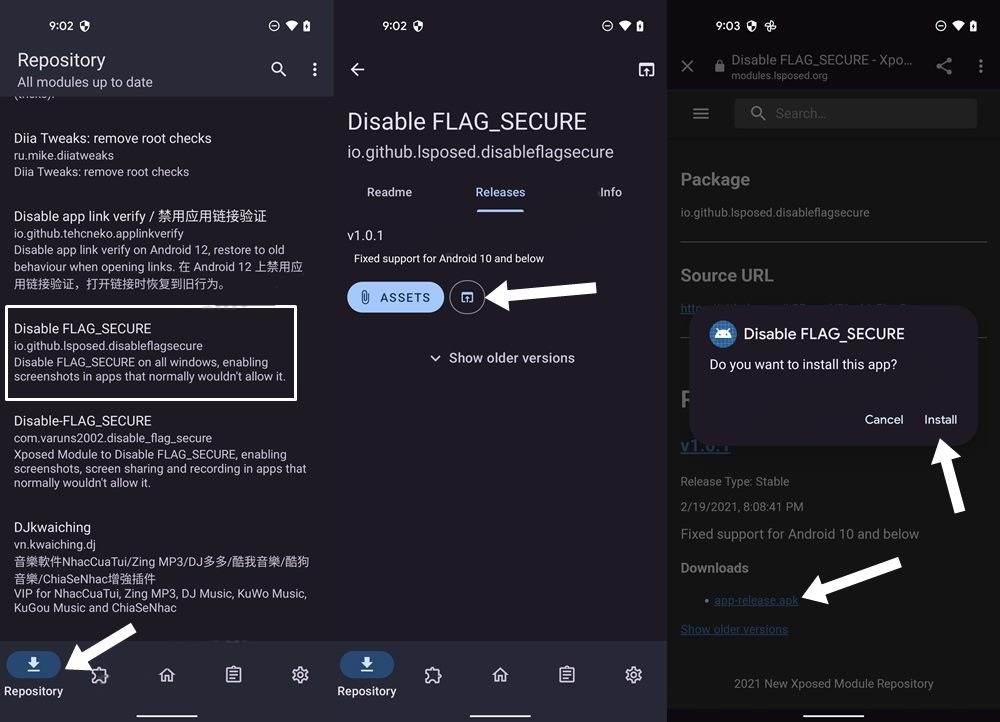
- Proceed with the on-screen instructions to download and install it.
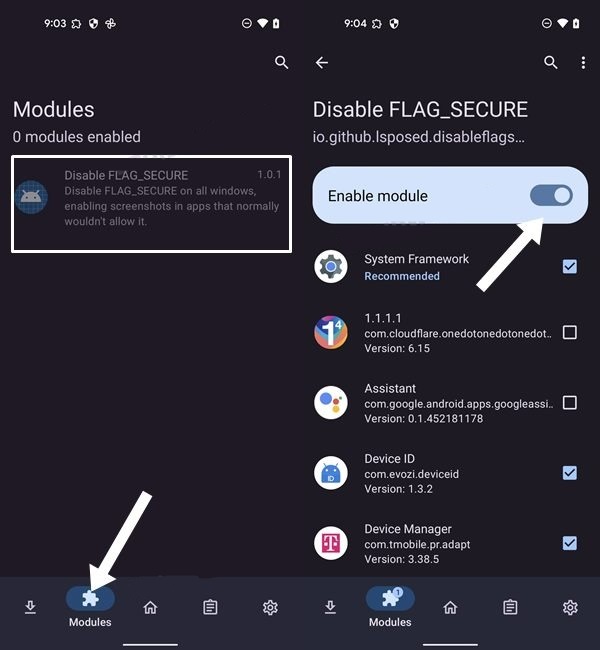
- Once done, come back to the LSposed Manager app and go to its Modules section.
- Then select the newly installed module and enable the toggle next to it to enable it.
How to Disable Xposed Framework and Modules
- Launch the LSposed Manager app and go to its Module section.
- Then select the desired module from the list and disable the toggle next to it.
- It will disable that specific module. You may disable other modules similarly.

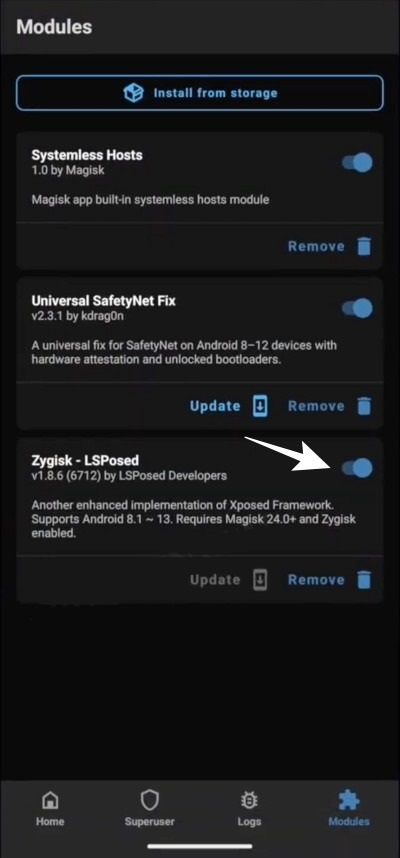
- On the other hand, to disable the Xposed Framework, launch the Magisk App.
- Then go to it Modules section and turn off the toggle next to Zygisk LSposed.
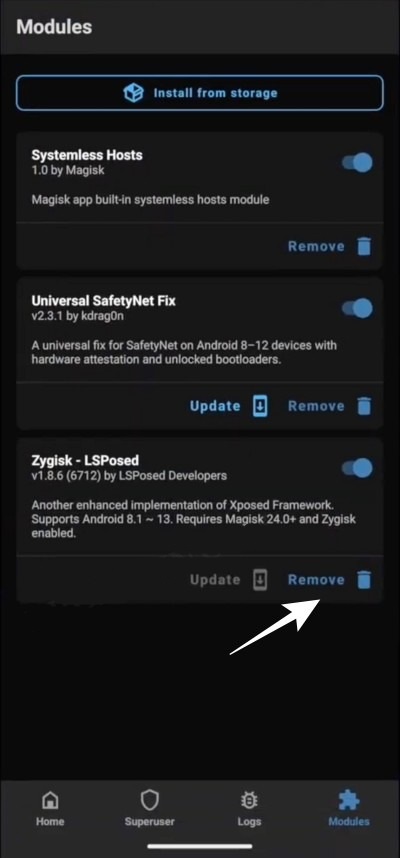
How to Uninstall Xposed Framework
- Launch the Magisk App and go to the Modules section.
- After that, tap on Remove next to Riru and then LSposed.
- Finally, restart your device for the changes to take place.
Fix Bootloop/Soft-Brick After Installing Xposed Framework
Don’t panic if your device is stuck in a bootloop or won’t start after installing Xposed. There are some easy ways to fix this problem that we’ll show you in this article. Just follow the steps in the guides we’ve linked below and you’ll be able to get your device back to normal in no time.
That’s it for this tutorial on how to get Xposed Framework on your Android 13 device. If you run into any trouble or have any questions, feel free to drop a comment below. We’ll try to help you out as soon as possible.